Showing posts with label Tasty Tuesdays. Show all posts

Sunday, 5 July 2015

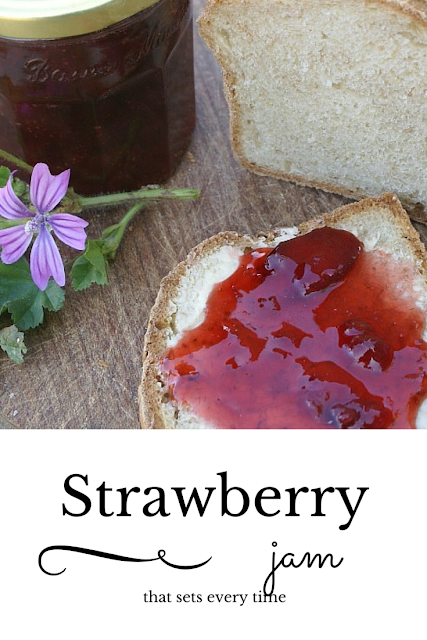
Strawberry jam - that sets!


I am sure if you asked 100 people what their favourite jam was then strawberry would be up there in the top three. However for makers of home-made jam, they will know it is one of the harder jams to make as it is a devil to get to set.  To make a jam that sets easily the fruit in it needs to have high levels of pectin and strawberries do not.  You can of course add commercial pectin but that puts up the cost.  You can also add lemon juice but I have found that often this flavour of lemon overpowers the strawberries or redcurrant juice, but this is not always available.  If you have an excess of strawberries crying out to be turned into jam here's how you can make strawberry jam that sets every time with nothing more than strawberries and sugar!


Strawberry Jam - that sets every time!


Ingredients


  • Strawberries
  • Equal weight of white sugar


Delicious strawberries


Method

  1. Remove the hulls from the strawberries then cut the bigger berries into 4 and smaller ones into 2.
  2. Mix together the sugar and strawberries in a large bowl
  3. Cover with a tea towel and leave in a cool place for 24 hours
  4. After 24 hours the strawberries will be swimming in  a sea of juice, drawn out by the sugar.  Add to a large pan with plenty of space to rise up and bring slowly to the boil, ensuring the sugar dissolves before boiling point is reached
  5. Boil for 5 minutes.
  6. Return to a cool place, cover and leave for 2 days.
  7. After 2 days bring to boil and fast boil (rolling boil) until setting point is reached* - usually 15-20 minutes. 
  8. Spoon into hot, sterilised jars and add lids whilst hot. 

* To Test for Setting Point

Place a china plate in the freezer.  Place a very small amount of jam on the cold plate where it will quickly cool. When cold push it with your finger and if setting point is reached the jam will wrinkle slightly when pushed.  If no wrinkles appear, continue to boil for a few more miutes and test again.


Strawberry jam recipe
Strawberries and sugar after 24 hours


A recipe for strawberry jam that really sets well
Jam just about to reach a rolling boil


Strawberry Jam recipe

Are you a jam maker - have you any tricks to get strawberry jam to set?


#NoWasteFoodChallenge

Friday, 27 February 2015

Wild garlic and leek risotto

Posted by Rosie

Today whilst out walking the dogs I saw the first leaves of wild garlic peeping through the cold, wet soil alongside the footpath.  For me this heralds the start of the foraging season and their appearance is something I eagerly await.  I love their pungent smell yet mild flavour and for the next couple of months will be adding them to all sorts of recipes. 

Wild Garlic Leaves


Some of my favourite recipes include:

Wild garlic omelette - if you can get hold of duck eggs for the omelette they go so well with the garlic
Topping for home-made pizzas
Thrown into stews at the last minute for a sweet garlicky flavour
Wild garlic pesto

and this:


Wild Garlic and Leek Risotto


Ingredients (Serves 4 as a main course or 6-8 as a starter)


75g butter
4 large leeks
500g risotto rice
Up to 2 litre of hot chicken or vegetable stock 
Large handful wild garlic leaves, roughly chopped if large
100g cheese of your choice - grated cheddar and Parmesan are both good or a mix of whatever cheeses you have.


Method


1. Melt the butter in a heavy bottomed pan
2. Meanwhile cut the cleaned leeks into 3cm pieces.  You can include some of the green part as well as all the white and the remaining green parts can be used to make veg stock.
3. Sauté the leeks in the butter until soft
4. Pour in the rice and stir to ensure each grain is covered in butter.
5. Add approx 100ml of stock and stir until absorbed.
5. Repeat this process until the rice is cooked
7. Once cooked stir in the wild garlic leaves and then the cheese
8. Serve with a green salad


Foraging Tips


  • If you have never foraged for wild garlic be sure that you know what you are picking. The leaves will have a noticeable garlic smell.
  • If you are at all unsure do not pick the leaves. There are various leaves that are similar in appearance and some are poisonous.  In the top picture the spotty leaves at the base of the garlic are Lords and Ladies (Arum maculatum) which are poisonous.
  • Only pick a few leaves from any one place and only then if leaves are plentiful.
  • If on private property seek permission from the owner before foraging.
  • Do not pick leaves that are very close to busy roads and you may want to avoid areas where many dogs are walked!

Do you cook with wild garlic?  If so I would love to know how you use it - we have so much here it seems a waste not to cook with it even more.

Pin me ...


The Mummy Toolbox

Saturday, 27 December 2014

Ginger Café Gourmand

Posted by Rosie


A popular dessert in France is a Café Gourmand, a cup of espresso (or tea/hot chocolate) served with a selection of mini desserts.  I love this way of eating dessert as you get to try more than one pudding without totally pigging out.  For the last few Christmases we have done a Christmas Café Gourmand and this year we continued the tradition but with a ginger theme.


So what did we have?


A cup of coffee/lemon and ginger tea or hot chocolate depending on taste!
A mini ginger cheesecake with rhubarb topping
Ginger cake
Ginger ice cream
Squirty cream with marrow and ginger jam.


Ginger Café Gourmand

It made a fitting end to a lovely Christmas meal, rich and creamy but small enough not to be sickly or too filling.

The cheesecake was a Waitrose recipe, the ginger cake was from my wonderful Farmhouse cookbook, the marrow and ginger jam recipe is here and the ice cream is my own invention.

Marrow and Ginger Jam
 

Ginger Ice Cream

Ingredients


  • 400g tin condensed milk
  • 500g pot crème fraîche
  • 2 balls of stem ginger - chopped finely
  • 2 tbsp syrup from the jar of stem ginger


Method


  1. Mix all the ingredients together and stir thoroughly
  2. Tip into an ice cream machine and set to whisk - if you don't have an ice cream maker the ice cream can be poured into a freezer container and frozen, then mixed thoroughly by hand when partly frozen.
  3. Once the ice cream maker has finished the cycle pour the ice cream into a freezer container.  The stem ginger has a tendency to sink so a flatter container is the best to use.  Alternatively give the mixture a stir when half frozen to distribute the ginger.

Note - The syrup prevents this ice cream freezing solid like other home-made ice creams so it is not necessary to allow it to soften at room temperature before serving.

What did you have for your Christmas dessert?  Did you go for Christmas pudding or did you chose something different? 


Link up your recipe of the week

Tuesday, 4 November 2014

Spiced Pumpkin Cake

Posted by Rosie

Spiced pumpkin cake is a lovely, sticky cake with warm flavours making it an ideal cake to make for Bonfire Night.  If you happen to have some pumpkin left over from Halloween this is also a great way to not waste it.  To make pumpkin purée either steam cubes of pumpkin or boil in the minimum amount of water until very soft.  In either case once cooked drain thoroughly in a colander and then mash to a lump free purée.

Spiced Pumpkin Cake


Ingredients


  • 175g castor sugar
  • 60g butter
  • 1egg
  • 250g plain flour
  • 1 tsp bicarbonate of soda
  • 1 tsp ground ginger
  • 1 tsp mixed spice
  • 1 tsp cinnamon
  • 125ml boiling water
  • 125ml black treacle (or half and half treacle and golden syrup)
  • 150g pumpkin purée


Spiced Pumpkin Cake

 Method


1.  Grease and line a 22cm square baking tin

2.  Cream together the butter and sugar until light and fluffy.

3.  Add the beaten egg and mix well (a small amount of the sifted flour added at this stage will stop the mixture curdling)

4.   Carefully and thoroughly fold in the remaining sifted flour, bicarbonate and spices

5.  In a large jug mix together the boiling water and treacle (or treacle/golden syrup mix), then stir the pumpkin purée into this liquid.

6.  Add this wet mix to the cake mix and stir well.

7.  Pour the mixture into the prepared tin and bake at Gas Mark 4, 180ºC for 40-45 mins.

When cold you can decorate the cake with glacé icing if liked.  I actually prefer it without icing but let do me know what you think.


For more food ideas which may also involve pumpkins why not have a look at some of these linkies: 

TastyTuesdays, Recipe of the Week, #NoWasteFoodChallenge and #TeaTimeTreats over at Hedgecomers.

 
#NoWasteFoodChallenge

Tuesday, 14 October 2014

Herb-Brined Roasted Turkey

Posted by Rosie


We rear our own turkeys and the question everyone tends to ask us is "Will you be eating one for Christmas?"  Actually, the answer is generally "No."  They end up being large birds and roasting a whole one gives too much meat for us and often the meat ends up a bit dry.  Instead we joint the birds and use the breasts in a variety of ways.  One of these is to brine and then roast them which gives a lovely meat, that slices well, similar to ham. It is not a quick recipe as it involves preparing your brine, soaking the meat, then drying it before roasting.  However the resulting meat is wonderfully moist and tasty so it is worth the wait.

Herb-Brined Turkey


Ingredients


1 - 4 turkey breasts: each approx 10cm thick
Brine:  This is enough brine for 4 breasts so reduce down the amount if you are are doing less.
 
  • 4l water
  • 225g salt
  • 125g sugar
  • 1 handful of tarragon, sage or marjoram (stalks included)
  • 1 handful of parsley (stalks included)
  • 2 bay leaves
  • 1 head of garlic cut in half horizontally
  • 1 onion sliced (No need to peel if clean)
  • 3 tbs lightly crushed black peppercorns
  • 2 lemons, halved


Herb Brine


 Method


1. Combine all the ingredients in a large pan, squeezing the lemon juice in before adding the lemons and heat until the sugar and salt dissolve.

2. Bring to simmering point, then remove from the heat and cool thoroughly.

3. When cool, refrigerate overnight if possible.

4. The next day place your turkey breast in a container large enough to allow the meat to be totally covered by the brine. A large lidded Tupperware box is great.  Add the brine so the meat is fully covered, placing a plate on top of the meat to ensure it remains totally submerged.  Cover the container and put it in the fridge.
 
5. Calculate how long you will need to brine the turkey:  
  • A boneless turkey breast about 10 cm thick will need 12-18 hours but if it is smaller simply brine it for less time. 
  • You can also brine whole turkeys and chickens.  A whole turkey weighting around 7kgs will need 24-36 hours and a whole chicken around 1.5-2kgs will need 8-12 hours.

6. Once brined remove the meat from the brine, rinse well and pat dry.  Let it rest, preferably uncovered in the fridge for 3-24 hours.  If you prefer you can wrap it in a clean tea towel or muslin cloth to dry.

7. After resting and drying, roast the turkey for the appropriate time for it's size.  You need it to reach an internal temperature of 71ºC with clear juices seen when pierced.  

8. Leave to rest for at least 15 minutes if serving hot. Alternatively let cool fully and served sliced like ham.


Herb-Brined Turkey

Have you ever had a go at brining food?  Have you made bacon, for example, and do you have a foolproof recipe to share?


Recipe of the weekCooking with Herbs Lavender and LovageTasty Tuesdays on HonestMum.com
#NoWasteFoodChallenge
 

Tuesday, 23 September 2014

Spicy Peach Chutney

Posted by Rosie


Our lovely neighbour, Bernadette, stopped me on the way back from the school bus-stop a few days ago and asked it I would like some peaches.  She has 2 peach trees growing on south-facing walls in her yard and they have fruited really well for the last couple of years.  The peaches are only the size of apricots and not as sweet as larger ones grown in the warmer south so they really need cooking rather than eating raw.   Once picked they do not keep well, so I needed to come up with something quickly, otherwise the pigs would be eating our bag of peaches!

Last year when she gave us a bag I came up with the idea of making a chutney based on a mango chutney recipe.  We all love mango chutney but we are unable to grow mangoes here (obviously!) and it is very expensive and difficult to buy locally.


Spicy Peach Chutney


Ingredients


  • 1.5kgs peaches – roughly chopped
  • 2 tbsp sunflower oil
  • 2 onions, thinly sliced
  • 5cm piece fresh root ginger, grated or chopped finely
  • Juice of 1 lemon
  • 1 cinnamon stick
  • 1 tsp ground cumin
  • 1 tsp ground coriander
  • 1/2 tsp black onion seeds
  • 1 tsp ground turmeric
  • 1 large red chilli finely sliced.  Remove the seeds for a less spicy chutney
  • 500ml water
  • 375ml white wine vinegar
  • 400g caster sugar
  • 1 tsp salt 

Makes 4-5 x 500g jars


Method

  1. Heat the oil in a large thick bottomed pan, add the onion and fry for a few minutes until soft.
  2. Stir in the ginger and cook, stirring frequently, for about 8-10 mins until the onion is golden.
  3. Add all of the spices, except the turmeric, and fry for 1 min.
  4. Stir in the turmeric and chilli, lemon juice and chopped peaches.
  5. Pour in the water and vinegar, add the sugar and salt, then cover and simmer gently for 30 mins.
  6. Take off the lid and leave to simmer uncovered for 30-45 mins until the mixture has thickened. You will need to stir it from time to time to stop it catching the bottom of the pan.
  7. It is ready when a wooden spoon drawn across the chutney leaves a trail that only gradually fills back up.
  8. Spoon into hot, sterilised jars and add lids whilst hot. 


As with most chutneys, the flavour improves with keeping, so store in a cool, dark place for a month before trying.  I also see no reason why this recipe would not work with nectarines or even plums, although with zero plums on our tree this year I will not be making any plum chutney this year!

Freestones and Clingstones


Did you know that peaches and nectarines have 2 distinct types of stone in them?  Sometimes when you eat one you will see that the stone comes away easily and cleanly from the flesh.  That is a freestone peach/nectarine. Other times the flesh clings firmly onto the stone in which case it is classed as a clingstone!  I learnt that on University Challenge! 

For more food ideas why not have a look at some of these linkies: TastyTuesdays, Recipe of the Week and #NoWasteFoodChallenge

Recipe of the weekTasty Tuesdays on HonestMum.com
#NoWasteFoodChallenge
 

Tuesday, 16 September 2014

Pickled Runner Beans


Posted by Rosie


Anyone who grows more than one or two runner bean plants will, more than likely, find themselves over-run with excess beans at some point.  Whilst they can be frozen, they are never as nice this way so for a different way to store them for later, why not pickle them?

(See below about successful cooking of frozen of runner beans.)


Pickled Runner Beans


Ingredients


  • 1kg runner beans
  • Salt
  • 300ml cider or white wine vinegar
  • 300g sugar
  • 100ml water
  • 1 tsp ground allspice
  • 1 tsp coarsely ground black pepper 
  • 6 juniper berries (optional)


Method


1.  Trim and string the beans then slice into thin lengths.
2.  Place them in a pan of lightly salted boiling water and cook until just tender (5-8 mins).
3.  Meanwhile mix together the vinegar, water, sugar, allspice, pepper and juniper berries and heat gently to dissolve the sugar.
4.  Bring to the boil and simmer for 2 minutes.
5.  Drain the cooked runner beans, add them to the boiling vinegar mix and simmer for a further 4-5 minutes
6.  Strain off and retain the vinegar.
7.  Pack the beans in warm sterilised jars, cover with the hot vinegar and cap with vinegar proof lids.
8. Store in a cool, dark place and use with 12 months.  The flavour is best if the pickled runner beans are allowed to mature for several weeks before eating.


Freezing Runner Beans


If you do want to get the best taste from frozen runner beans I can recommend 2 methods which will help them taste more like freshly cooked beans.

1.  Steam from frozen rather than boil them
2.  Double boil them.  Place the frozen beans in a pan and cover with boiling water then immediately drain them.  Add more boiling water cook to your preferred tenderness.


The French are only just catching on to the idea of eating runner beans.  You can find the seeds here but you invariably have to look in the flower section under Haricot d'Espagne.  Beware though, you'll pay a fortune and only get about 5 seeds.  Better if possible to import from the UK or save your own seeds.


For more food ideas why not have a look at some of these linkies: TastyTuesdays, Recipe of the Week and #NoWasteFoodChallenge

Recipe of the weekTasty Tuesdays on HonestMum.com
#NoWasteFoodChallenge
 

Tuesday, 9 September 2014

Blackberry and Apple Cake

Posted by Rosie


The Season of Mist and Mellow Fruitfulness (To Autumn by Keats) gives us bountiful harvests and whilst we preserve some for use later in the year some does get eaten straight away.  Our apple harvest, as you may have read a couple of weeks ago, was dire and even those apples we did harvest are not storing.  In comparison the blackberry harvest is fantastic this year.  Time therefore, to adapt as apple cake recipe to make use of what we have.  Time for blackberry and apple cake:


Blackberry and Apple Cake


Ingredients


  • 75g/3oz butter
  • 150g/6oz sugar
  • 225/8oz self-raising flour
  • 350g/12oz cooking or eating apples - peeled, cored and cut into small cubes
  • 2 eggs, beaten
  • 2 tbsp milk
  • 125g/5oz blackberries
  • 1tbsp extra sugar for dusting


Method


1.  Grease and line a cake tin (22cm x 18cm - 9" x 7")
2.  Cream together the butter and sugar and beat until light and fluffy
3.  Mix 1tbsp of flour with the apple cubes (this will help them not to sink in the cake)
4.  Mix together the beaten eggs and milk and add to the creamed mixture (a little of the flour added at the same time will help prevent the mixture curdling)
5. Add the remaining flour and apples cubes and carefully mix together
6. Spread the mixture into the lined cake tin
7.  Dot the blackberries evenly on the surface and gently press into the mixture
8.  Sprinkle with the remaining sugar 
9.  Bake at Gas Mark 4, 180ºC, 350ºF for 40 mins until golden brown


This cake is lovely served cold for a teatime treat or hot as a dessert with a good dollop of cream!

For more blackberry inspiration have a look at this other post I have written - 10 brilliant blackberry recipes. 

#NoWasteFoodChallenge
Recipe of the week
Tasty Tuesdays on HonestMum.com


Tuesday, 26 August 2014

Marrow and Ginger Jam

Posted by Rosie


If you grow courgettes or you know some-one who grows courgettes, sooner or later you will find you have either a courgette that got away and turned into a marrow or a marrow or 3 will be given to you by friends who have suffered the same fate.  Worse still you may even grow marrows and soon you may well find yourself drowning in them.

The courgette that grew up to be a marrow

What can you make with an excess of marrow?

Some people apparently like it lightly steamed (not my favourite I have to confess)
Various marrow chutney recipes are possible
Stuffed with mince or spiced vegetables makes a tasty meal.

Or, for something a bit different, I suggest Marrow and Ginger Jam.  It may seem odd to be making jam from a marrow but I can assure when mixed with the sugar and the ginger it makes a really tasty preserve.


Marrow and Ginger Jam


Ingredients


  • 450g/1lb marrow (weighed after peeling) - cut into small cubes
  • 450g/1lb sugar
  • 1tsp ground ginger or 1-2oz crystallized ginger, chopped finely
  • Juice 1 large lemon 

    Method


    1. Sprinkle the sugar over the marrow, cover and let it stand overnight in a cool place.
    2. The next day put the sugar and marrow in a preserving or large pan and warm gently until the sugar has dissolved.
    3. Add the ginger and lemon juice then boil steadily until the cubes look transparent and the syrup has reached setting point.*
    4. Pour into hot, sterilised jam jars and cover at once.


    * to check if the syrup has set place some thinly on a cold plate.  Allow it to cool and then push it gently with your finger. If a skin has formed on the syrup that crinkles up slightly when you push it then setting point has been reached.  If not continue to boil until you do reach setting point.

    Occasionally my syrup won't set.  Don't worry if this happens to you.  If this is the case simply call it marrow and ginger sauce and eat it with ice cream, pancakes etc.


    Marrow and Ginger Jam

    Do you have any favourite marrow recipes?  I have made jam so I could do with some meal ideas now.  Thank you!

    Tuesday, 12 August 2014

    Chilli Courgette Pickle

    Posted by Rosie


    Being an expat there are always a few things you miss from home.  Take Branston Pickle.  Now we can get Branston Pickle when we go back to the UK and we can buy it from the English section of the local supermarket if we are prepared to pay an exorbitant price but really we needed to find something that we liked as much as Branston and also hopefully used some ingredients we often have an excess of.   Enter my friend J with her hot chilli courgette pickle recipe.  It has a similar texture to Branston and a taste not too unlike it, although quite a bit  hotter which we like, and perhaps most importantly,  it helps use up the annual courgette glut.


    Chilli Courgette Pickle

    Ingredients


    • 2.7kg/6lb Courgette finely- a mixture of yellow and green courgettes give a nice colour to the pickle
    • 85g/3oz salt
    • 425g/1lb Onions finely diced
    • 3 hot chillies very finely diced with seeds (more if you like things really hot)
    • 1litre/2 pts cider vinegar
    • 500g/1lb 2 oz dark brown sugar 
    •  225g/8oz Demerara sugar
    • 3tsp Turmeric
    • 3tsp dry mustard powder
    • 30g/1.5oz cornflour


    Diced courgettes


    Method


    Makes 6 x 425g/1lb jars

    1. Steep courgette in the salt for 3hrs
    2.  Rinse the courgettes well and drain in a tea towel/muslin in a colander or in  a jelly bag overnight.   
    3.  When fully drained boil up the courgettes with the rest of ingredients (except sugar and cornflour) until the vegetables are just soft.
    4.  Add the sugar and boil for 5 minutes, stirring occasionally. 
    5.  Mix the cornflour with a little cold water, add to the pickle and then boil to thicken, stirring to stop it sticking.
    6.  Pour into hot sterilised jars and put the lids on when hot.

    Chilli Courgette Pickle ready to pot up

    Leave the pickle for a month to allow the favours to develop and then enjoy!

    Tom and I particularly love this pickle - it's great with so many things including cheese sandwiches, scrambled eggs, curries and salads.

    Chilli courgette pickle

    Do you have a favourite pickle or courgette recipe?  Please do let us know about it if you do.  We still have a lot of courgettes to get through!

    Linking up with lots of food linkies including TastyTuesday, Recipe of the Week and #FoodieTuesday

    Link up your recipe of the week
      Tasty Tuesdays on HonestMum.com